Our comprehensive guide to building in Valheim will teach you about building stability, how to make stone structures, building chimneys to prevent smoke buildup, and more. On this page:
Valheim building tips: how to build a base Valheim building stability & integrity How to make Stone buildings in Valheim Valheim building decay explained How to build a chimney in Valheim Ignore snapping for more precision
Valheim building overview: how to build a base
To build a base, you’ll need a few things. Firstly, you’ll need a Hammer. The Hammer is your tool for constructing every single placeable structure in the game. You can craft a Hammer directly from your inventory crafting menu. To use the Hammer, equip it and then right-click to bring up the build menu, where you can choose what you want to place. You can then rotate the piece in the world with the mouse wheel, and left-click to place it. You can also remove built structures and building parts by placing your reticule over them with your Hammer equipped, and pressing the Deconstruct key (default: middle-mouse click). You can do this even while attempting to place another building part. Another thing you’ll need to build a base is a Workbench nearby. Most buildings can only be built near a Workbench. If you’re trying to place something and you’re near a Workbench, you’ll see a white dotted-line circle on the ground around the Workbench. You can only place a building part if you yourself are standing within this circle. It’s also a very good idea to craft a Hoe after building your Workbench, so that you can start flattening the ground nearby. It’s far, far easier to build on flattened ground than the naturally bumpy and uneven terrain that Valheim provides.
Valheim building structure: stability & integrity
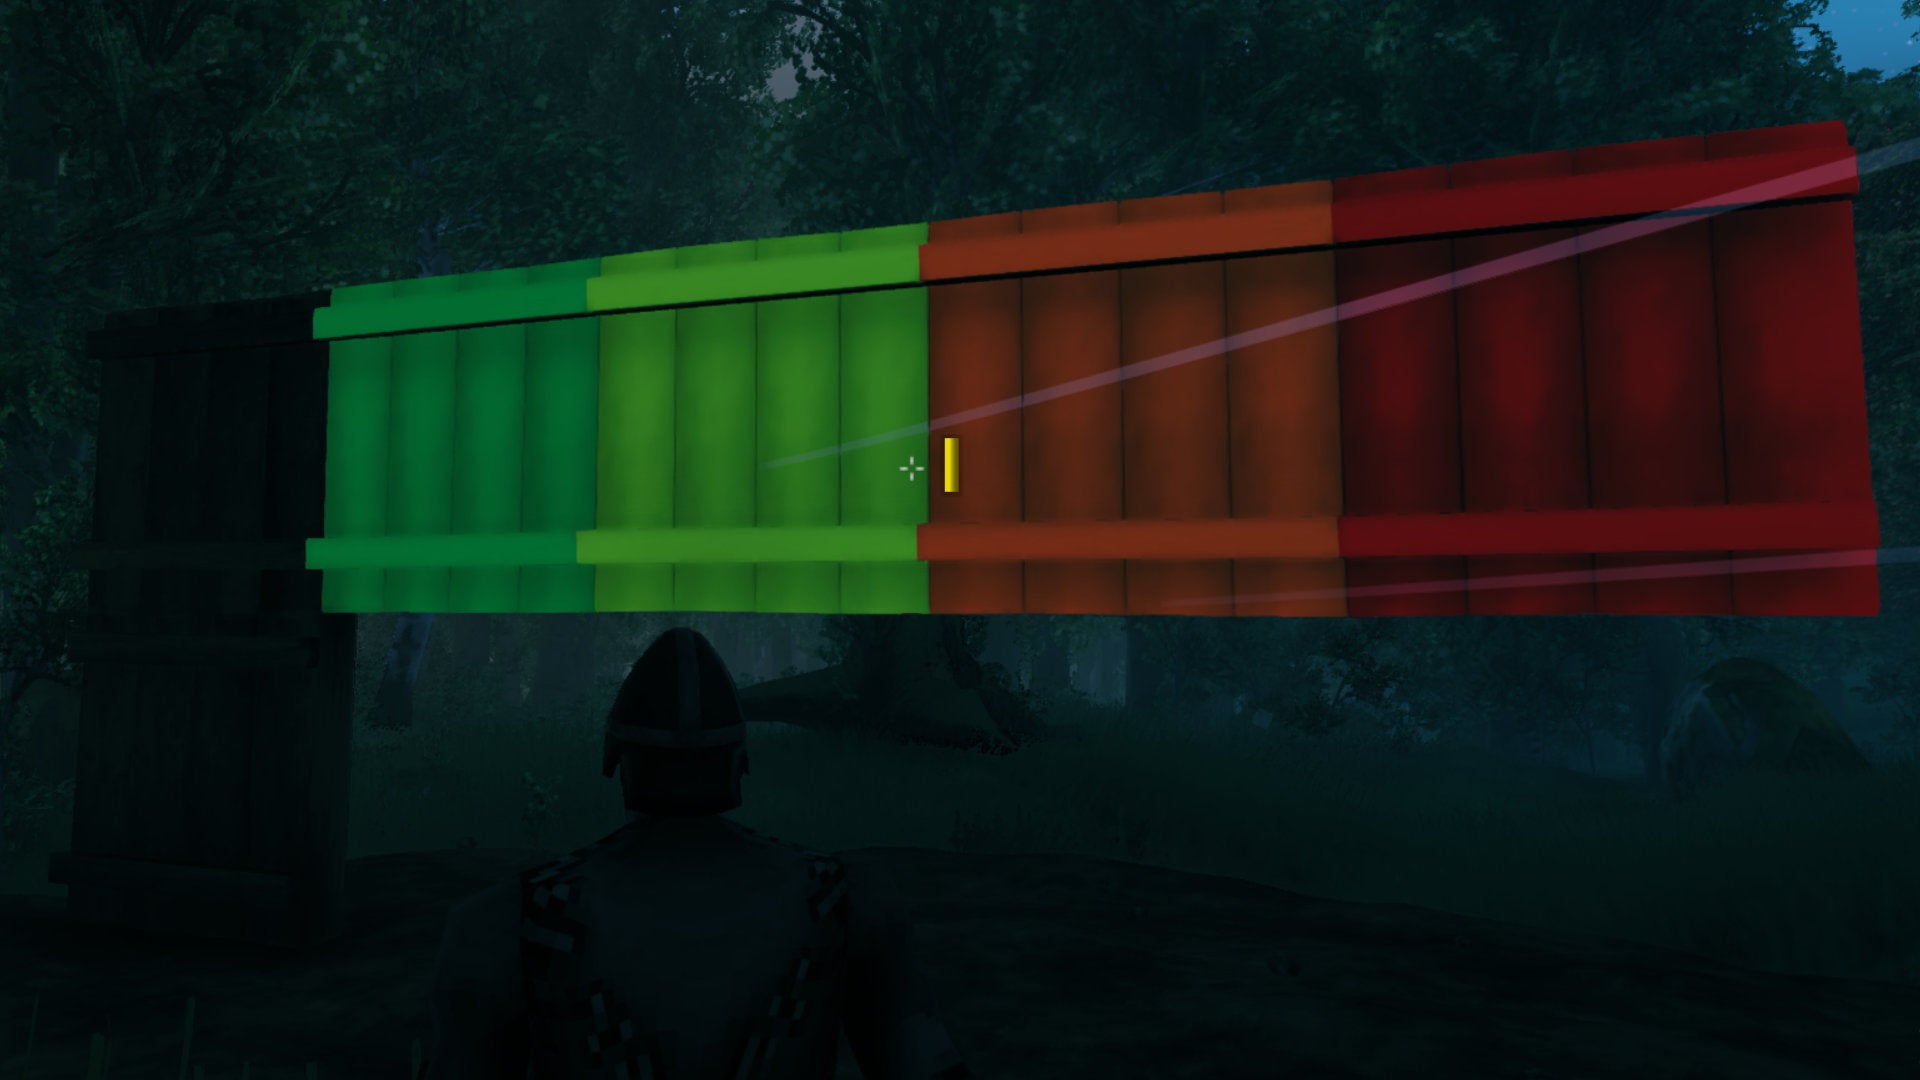
When building a base or a house in Valheim, you’ll need to pay attention to the building’s stability, or structural integrity. With the Hammer equipped, place your cursor over a building part that you placed down. The colour of the part illustrates how strong or weak it is. Blue is strongest, followed by Green, then Yellow, then Orange, then Red. If you see parts that are yellow, orange, or red, that means the part isn’t properly supported by the ground or by other building pieces. If you build too far out in the air without supporting your build, then after a certain point, newly placed parts will just collapse. Fortunately, providing good support is fairly simple to understand in Valheim. The stability of each piece is measured by the shortest path down to the ground from that piece. If it’s on the ground, then it’s blue, and very stable. If it has to go through other building parts to get to the ground, then it’ll be less stable. After six or so parts, you’ll reach a limit where anything you try to build will immediately collapse. The best thing to do if you’re trying to make a tall build is to make some 4 metre poles out of Core Wood (chop down some Pine Trees in the Black Forest biome). These tall poles can reach very high all by itself, giving you a stronger foundation for taller builds.
How to make Stone buildings in Valheim
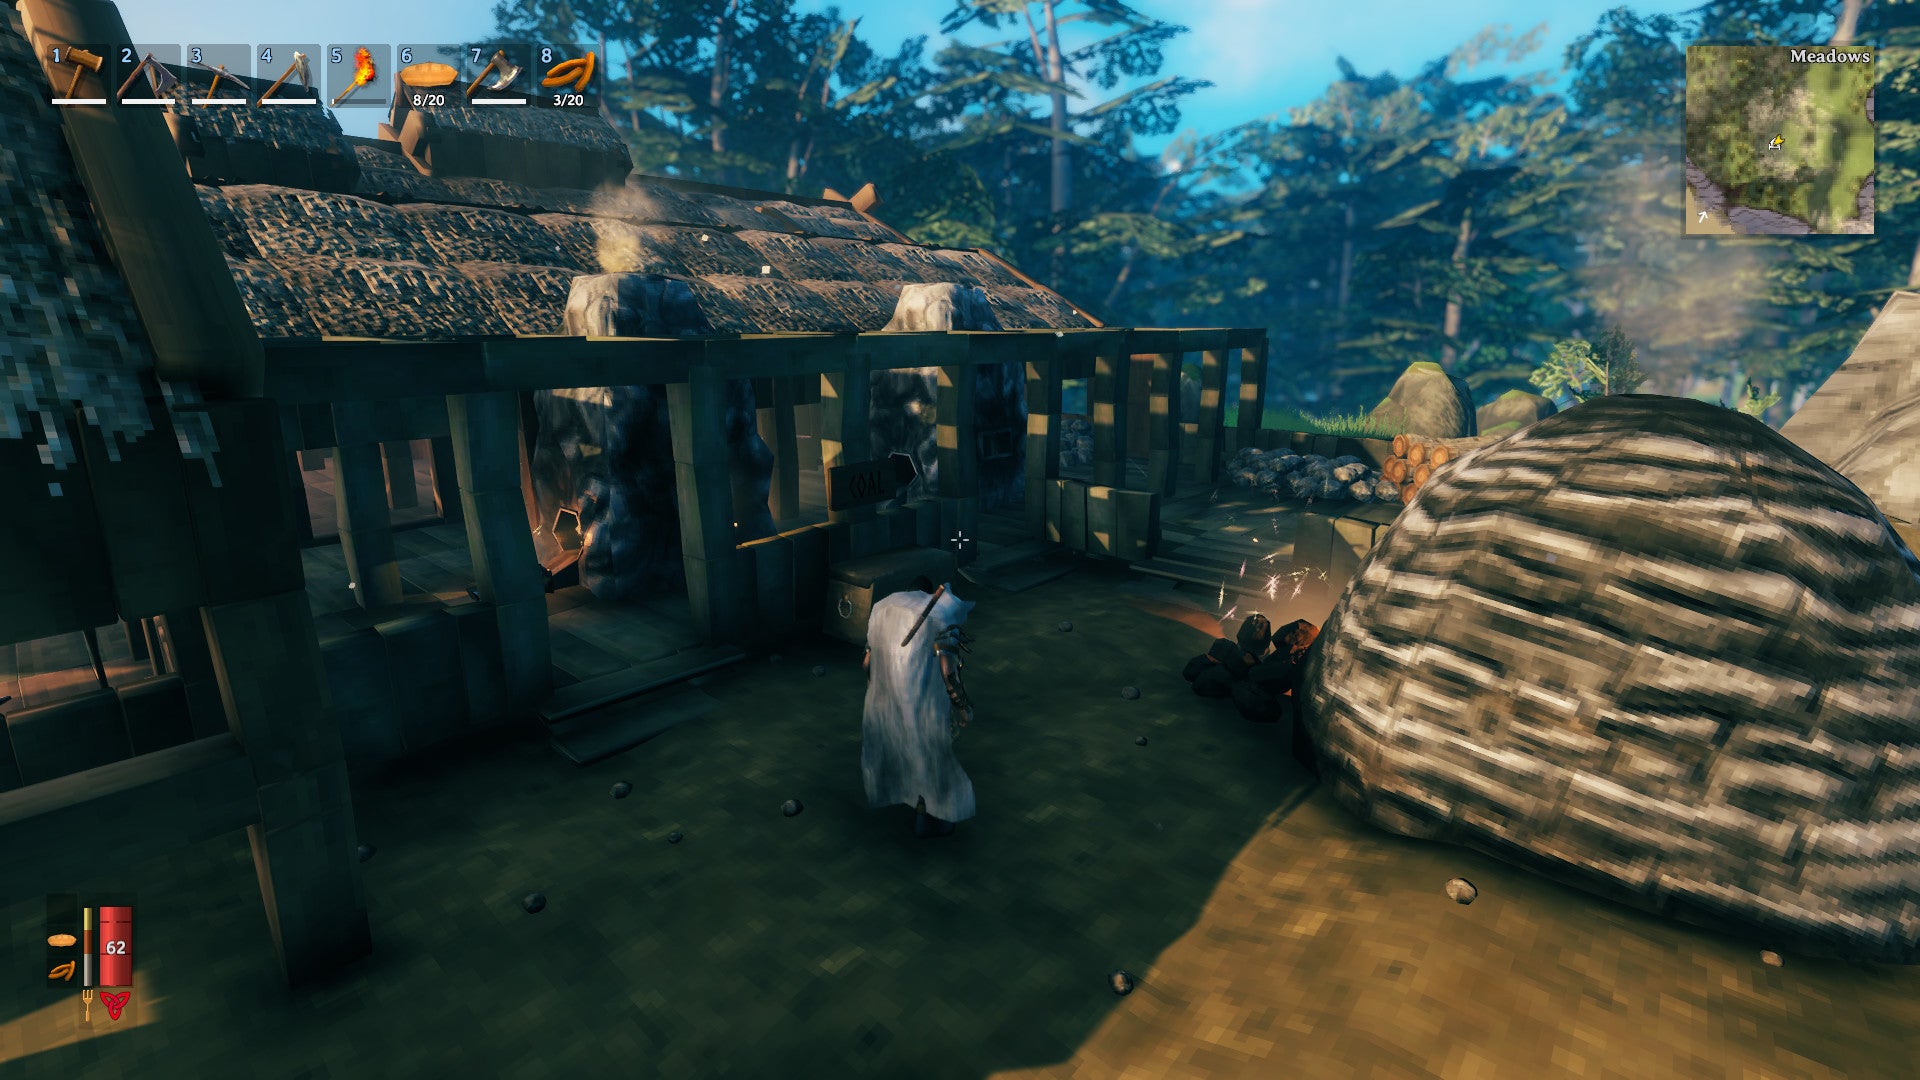
Wood isn’t the only building resource in Valheim. Stone is obviously a much stronger material and makes for more stable foundations and structures. So how do you make Stone buildings? To start using Stone building parts, you’ll need to craft a Stone Cutter. The Stone Cutter requires 2 Iron Ingots to craft, so you’d best consult our Valheim Iron guide to learn where you can find Iron deposits. Once you’ve placed a Stone Cutter, interact with it and, just like with the Workbench, you’ll find a host of new building parts added to your Hammer build menu, including all sorts of Stone structure pieces.
Valheim building decay explained
Any wooden building part that isn’t covered by a thatched roof tile will get damaged over time if it rains. Which makes sense, because wood hates water. All buildings have a durability or health value, and if a wooden piece is rained on it will continue to decay down to a minimum of 50% health. You’ll know if this happens because the wooden piece will turn a slightly different and less healthy colour. But don’t despair! The decay rate is fairly slow, and you can repair a building part using the Hammer tool. Another little tip is that it never rains in The Plains biome, so you can leave wooden tiles uncovered in that biome and it’ll never decay.
How to build a chimney in Valheim
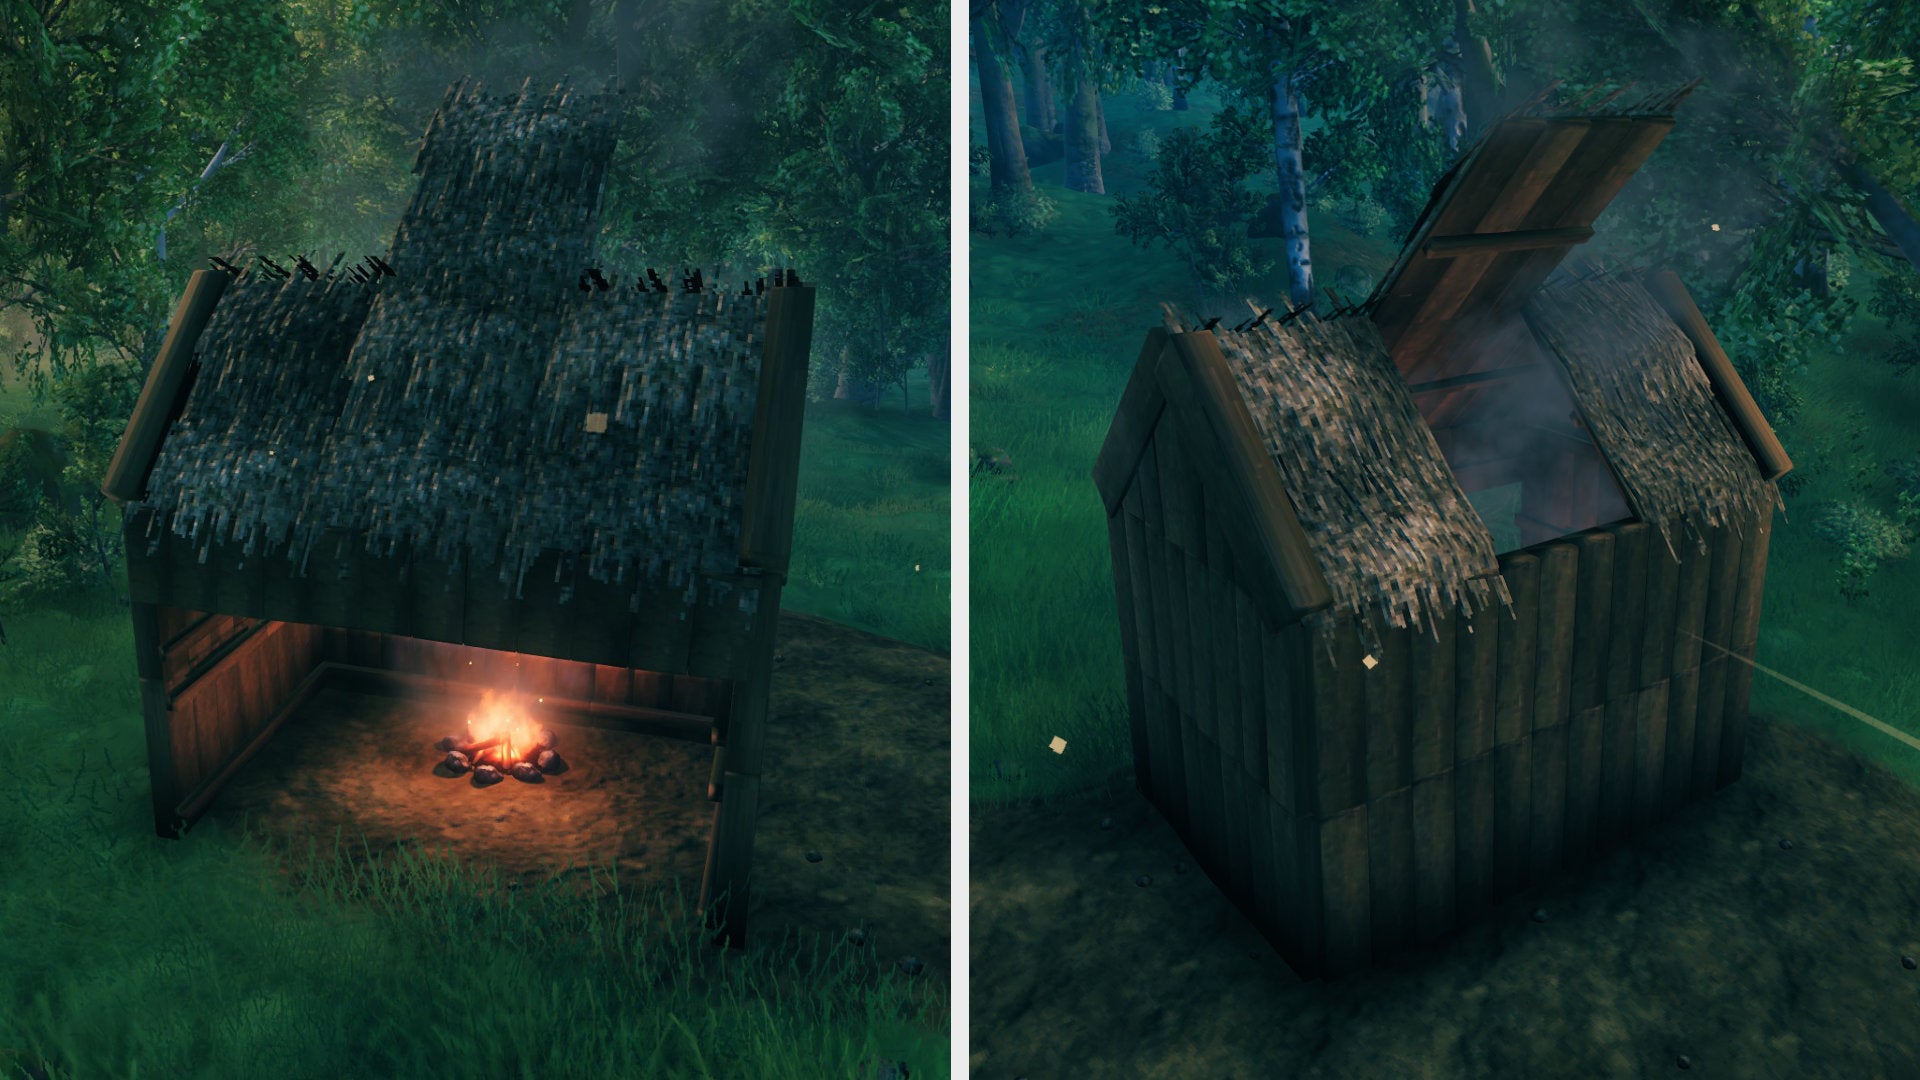
Another cool thing that Valheim simulates is smoke. If you build a firepit indoors, then smoke will collect above and around it unless it has some way to escape the room. This is important, because a room filled with smoke will damage you over time as you inhale the fumes. To prevent this from happening, you’ll need a chimney. In Valheim, “chimney” is used in the loose sense of just “a place where smoke can escape”. The simplest possible method of building a chimney is to simply delete one of your roof tiles above the firepit so the smoke can escape. However, with no roof tile above it, your firepit is vulnerable to rain. The solution here is to place another roof tile in the opposite direction, as you can see from the image below: This way, the rain can’t get to the firepit, but the smoke is still able to escape the room.
Ignore snapping for more precision
One final tip for those embarking on their first major build in Valheim: you can hold “Shift” while attempting to place a building part, and the game will turn off the automatic snapping to nearby objects, allowing you to place the part exactly where you want it. This is useful for when you get to the finer details of your building. Alright, that’s just about everything you need to know to get started with your Valheim building career! Now why not supplement your knowledge with our guide on how to set up a Valheim dedicated server? Alternatively, you may wish to expand your building horizons by downloading the Valheim Plus mod. If you’ve only just jumped into this Viking sandbox, master the basics with our beginner tips and tricks guide.


